Google Authorship – How to setup on WordPress
Get your photo to show next to your links in Google Search
Have you seen photos of authors showing in search results on Google?
Are you more inclined to click on a link that has a thumbnail image of the author?
Do you think it’s beneficial in creating an emotional connection with the searcher?
I believe it is.
In this era of ‘relationship marketing’ it’s important to humanize your business and this is one way of creating that connection with prospects.
This is called Google Authorship. Here are some instructions to help you set it up for yourself based on WordPress.
MANUALLY SETUP GOOGLE AUTHORSHIP ON WORDPRESS POSTS
To setup your Google Authorship manually you have to link your Google Account (your Google+ Profile) with your blog posts via a snippet of HTML code.
STEP 1 – Setup Google Account
Create your Google+ Account if you haven’t got one already, otherwise review your Google+ Profile;
Verify any additional emails with your Google Account Profile, in particular the email you will be using in the WORDPRESS USER profile of your website;

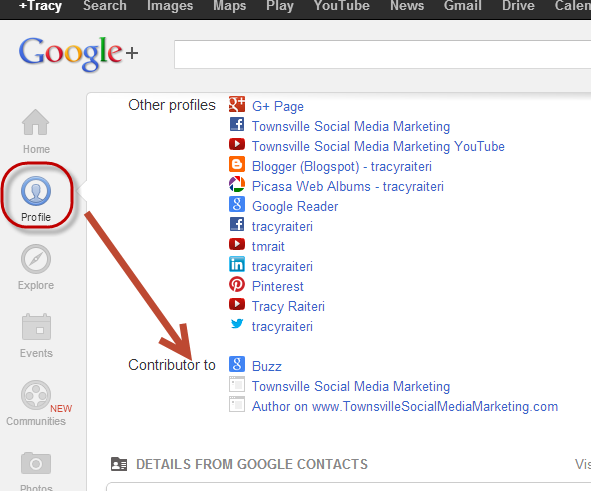
Include both your blog website URL (eg https://townsvillesocialmediamarketing.com) and the URL of your WordPress Author Profile (eg https://townsvillesocialmediamarketing.com/author/tracyr/) in your list of “Contributor”:-
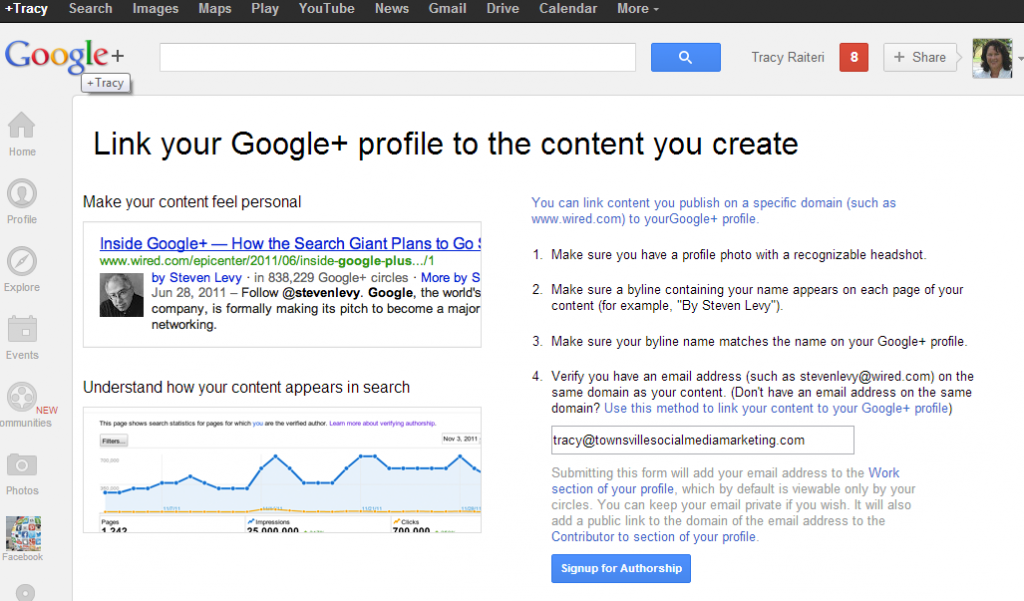
Signup with Google for Authorship at https://plus.google.com/authorship include your domain email address that will be used in the WordPress Author Profile. This will then add your domain email address as your WORK email on your Google+ Profile.
Make a note of the name you use on your Google Account and your GoogleID (that’s the weird number in the URL web address);
Also, make sure the “+1′s” tab is showing on your Google+ Profile.
Step 2 – Add the link to WordPress blog posts that you author
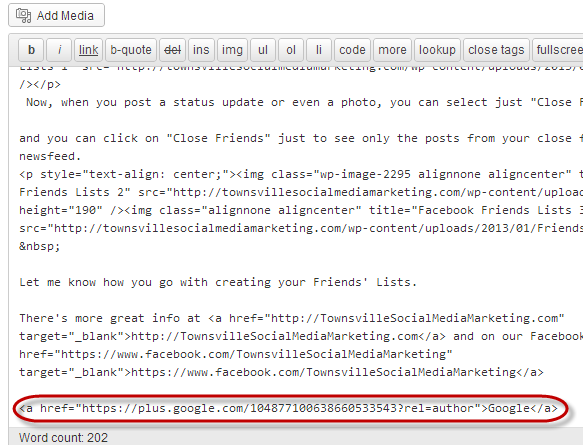
When you create a post article include the following HTML code somewhere on the article:-
<a href=”https://plus.google.com/[insertGoogleIDnumberhere]?rel=author”>Google</a>
Eg Mine is:
<a href=”https://plus.google.com/104877100638660533543?rel=author”>Find me on Google+</a>
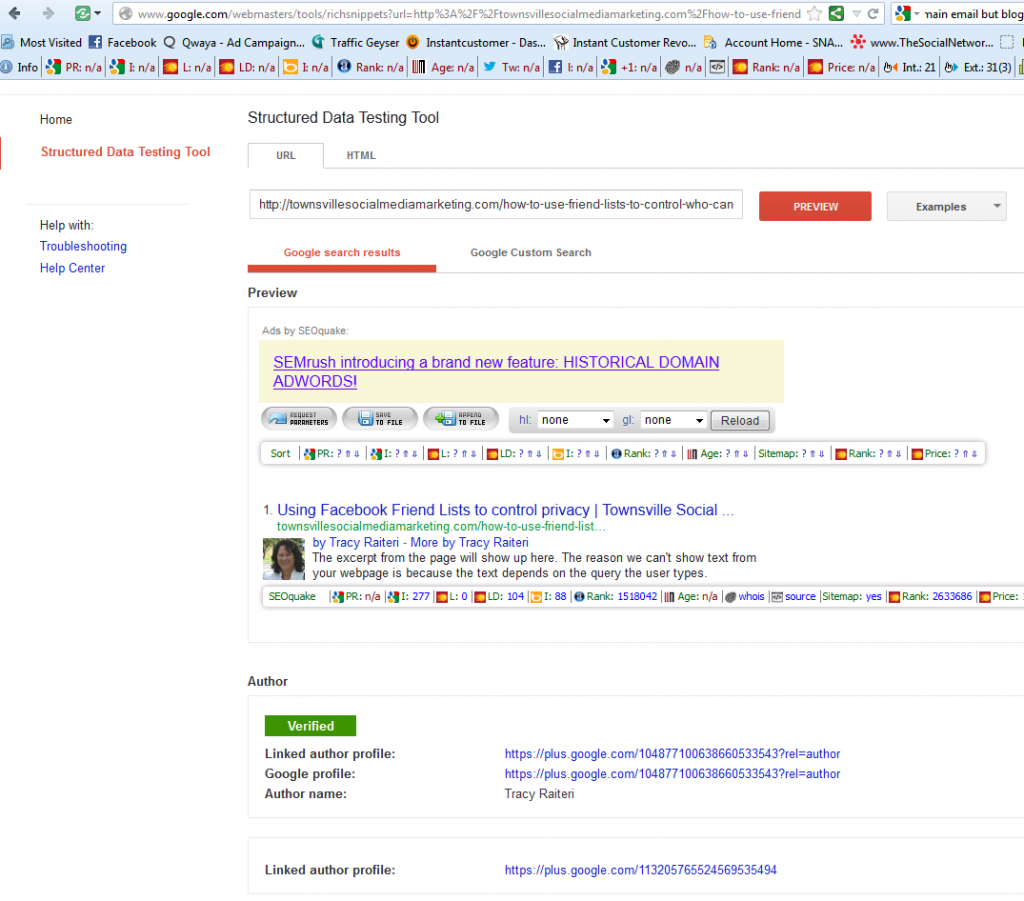
Step 3 – Verify that Google Authorship works
Then check what will be displayed by inserting the webpage URL of the article into:-
http://www.google.com/webmasters/tools/richsnippets
TIP: In WordPress, your Google+ Profile name should be the same as the “Display Name of the Author” in the WordPress User setting so it shows on any WordPress Articles you author.
AUTOMATIC SETUP OF GOOGLE AUTHORSHIP ON WORDPRESS BLOG
If you’re using WordPress, there are plugins that will automate the display of an “Author Box” at the bottom of each post created by each Author where you can add this Google Authorship code so it will display on all blog articles by that author.
Step A – Login to the WordPress Dashboard of your website and install a plugin that will display an author box. The WordPress Plugin I used is “WP ABOUT AUTHOR” (it’s not the best, so let me know if you find a better plugin).
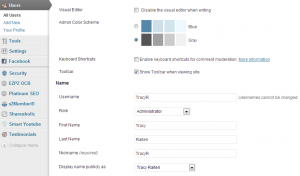
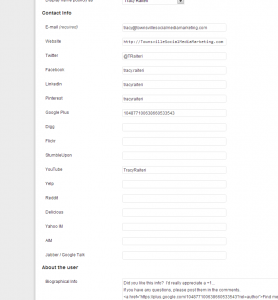
Step B – Go back and edit the “USER” settings to include links to the Author’s social media, including Google+. With the plugin I used I only needed to add the custom part of the URLs not the whole URL. NOTE: I even added an extra “Find me on Google+” in the Bio text box. (Don’t forget to click SAVE)
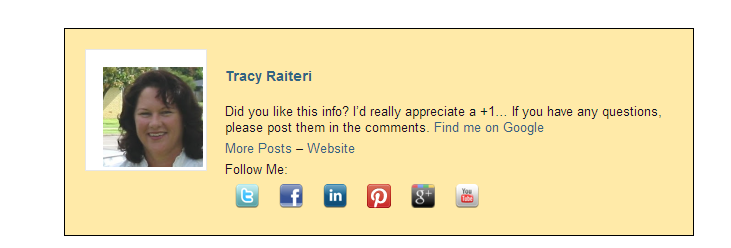
Step C – Now, check out a blog that you are an “Author”, you should see a box at the bottom that looks something like:-
NOTE: It will take anywhere up to a month for Google to start showing your image in search results… you can’t rush these things :)
Let me know how you go.
PS If you thought this post was helpful, please +1 it, and post your Google+ link in below so I can ‘Circle’ you.
UPDATE – Google Authorship Approval
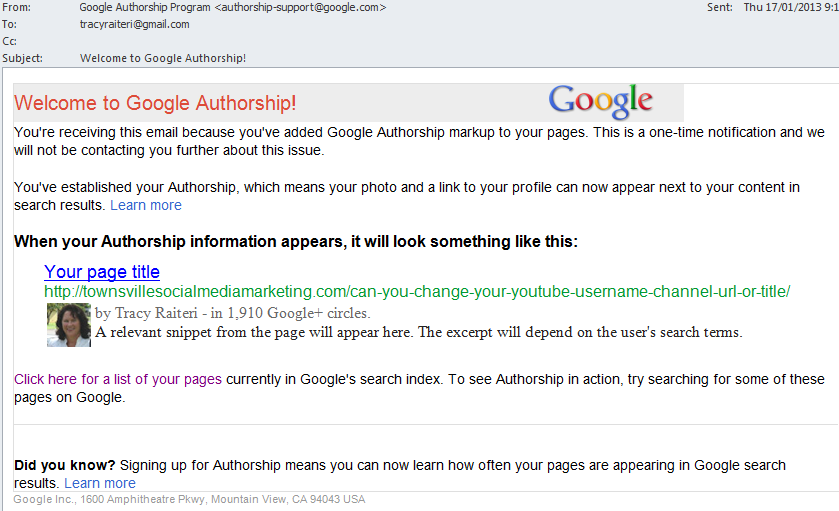
It’s now the 17th January, 2013 (that’s 6 days from when I applied) and I just received an email from Google saying I have been approved and giving me a list of web pages that have been authorshipped (if that’s such a word, if it’s not, then I claim it).


Leave a Reply